Car DIY: 7 Simple Maintenance Checks Every Driver Can Do at Home
Regular vehicle maintenance does not always require a visit to the workshop. While complex mechanical repairs should be handled by trained professionals, several basic checks can be completed safely at home. These simple tasks can help prevent breakdowns, improve fuel efficiency and identify small problems before they become expensive repairs
1. Check the Engine Oil
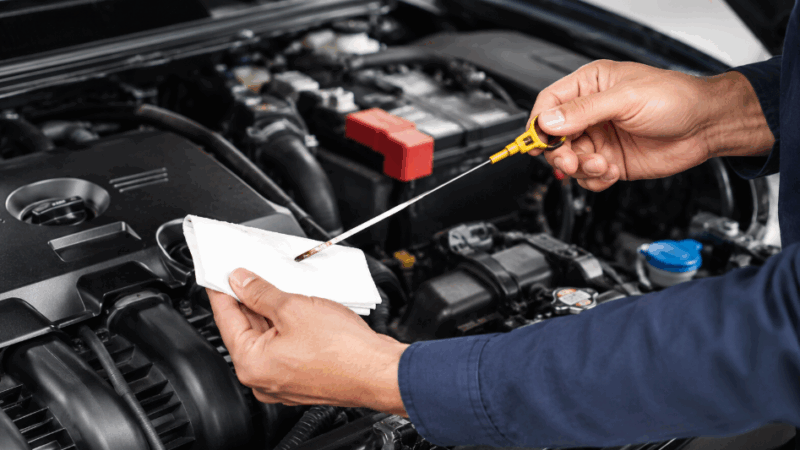
Engine oil lubricates moving components and helps protect the engine from heat and wear. Park the vehicle on level ground, switch off the engine and allow it to cool for several minutes.
Remove the dipstick, wipe it clean and insert it fully before checking the level again. The oil should sit between the minimum and maximum marks. If it is low, add the correct grade gradually and avoid overfilling.
Drivers should also examine the oil’s condition. Very dark oil can be normal in some engines, but a thick, gritty or milky appearance may require professional inspection.
2. Inspect Tyre Pressure
Incorrect tyre pressure can affect handling, braking, fuel economy and tyre life. Use a reliable pressure gauge when the tyres are cold and compare the reading with the manufacturer’s recommendation, usually found inside the driver’s door frame or in the owner’s manual.
Do not rely on the pressure printed on the tyre itself, as this normally indicates the tyre’s maximum limit rather than the recommended operating pressure.
Remember to inspect the spare tyre as well.
3. Examine Tyre Tread and Condition
Look for uneven wear, cracks, cuts, bulges or objects embedded in the tread. Uneven wear may indicate incorrect pressure, wheel misalignment or suspension issues.
Tyre tread must remain deep enough to provide grip, particularly during rain. Drivers can use a tread-depth gauge for a more accurate measurement. Any tyre showing structural damage should be checked immediately by a specialist.
4. Check Coolant Levels
Coolant regulates engine temperature and protects the cooling system. Only inspect the coolant reservoir when the engine is completely cold. Opening a hot cooling system can release pressurised liquid and cause serious burns.
The coolant level should remain between the marked limits. Always use a coolant type approved for the vehicle, as mixing incompatible formulas may damage the system.
Repeated coolant loss should not be ignored because it may indicate a leak.
5. Test the Lights
Ask someone to help you check the headlights, brake lights, indicators, reversing lights and hazard lights. Drivers can also use a wall or reflective surface when checking some exterior lights alone.
Replacing a faulty bulb is relatively simple on many vehicles, although some modern models require professional access or electronic resetting.
6. Inspect the Wiper Blades
Wiper blades should clear the windscreen smoothly without leaving streaks, skipping or making excessive noise. Cracked or hardened rubber should be replaced.
In hot climates, strong sunlight can damage wiper blades more quickly, even when rainfall is limited. Maintaining good visibility is essential during rain, dust and humid conditions.
7. Check the Battery Area
Inspect the battery for loose connections, corrosion or swelling. A small amount of corrosion around the terminals may sometimes be cleaned carefully, but severe corrosion, leaking or battery deformation requires professional attention.
Never place metal tools across the terminals, and avoid working on the battery unless you understand the correct safety procedure.
Know When to Stop
DIY maintenance is useful for routine inspection, but it should not replace qualified servicing. Warning lights, fluid leaks, unusual noises, braking problems or overheating require professional diagnosis.
By completing these basic checks regularly, drivers can keep their vehicles safer, more efficient and better prepared for daily journeys.